
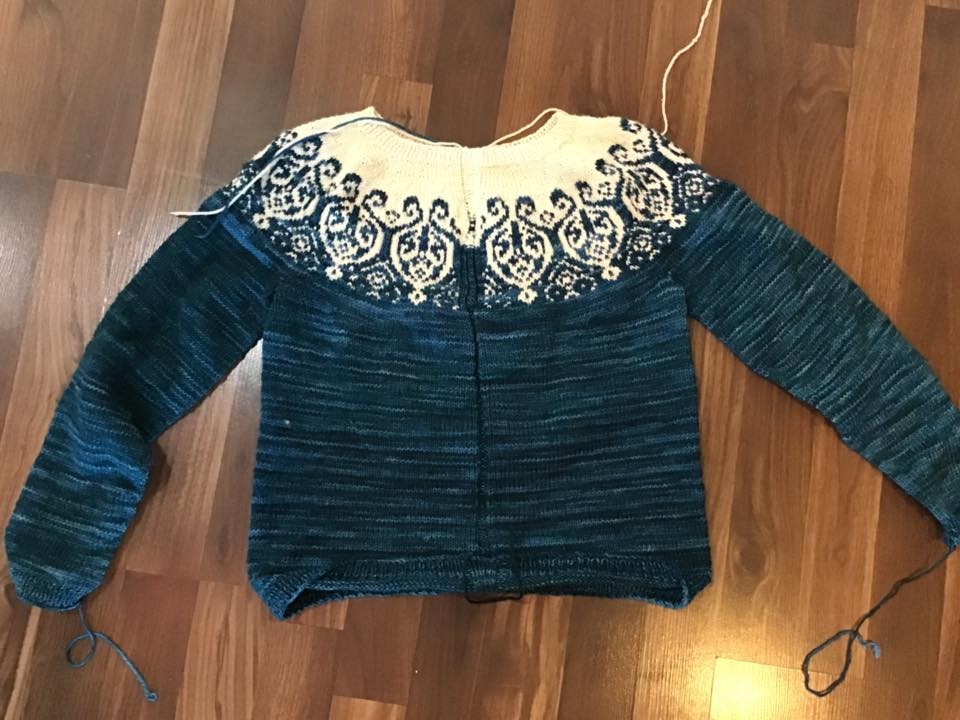
I think it’s fair to say that my steeking experience completely lived up to my expectations – which is to say, miserable. (Background: steeking is a technique in which you work a sweater as a pullover, sew or crochet some reinforcing lines, then but up the front to make it into.a cardigan. It’s faster to knit and provides more even results in colorwork sweaters, and is a traditional method in Norwegian knitting.)
We have a sewing machine, but I hadn’t used it at all (and have only used any sewing machine a couple times in my life). Ted’s used it, but not enough to keep him from having to figure it out anew each time. So that was the first problem – it took me over an hour just to figure out how to thread the damn thing, and probably another hour to figure out everything else I needed to know about it and experiment on some scrap fabric and then a knitting swatch.
I considered running a basting line where I wanted to sew, but I tested that and it turned out to be nearly impossible to see; however, it wasn’t hard to see where I needed to go anyway because this pattern’s steeking section includes four purled stitches in the center with two knit stitches on either side. More or less easy to see, anyway. (First bad design decision; the stitch lines are supposed to run up the center of the outer purled stitches – any experienced knitter who’s done ribbing will know that the first purled stitch next to a knit section will try to curl up and hide behind its neighbor knit stitch.)


I do not have a picture of my first sewn line – that would be the one where I sewed the front of the sweater to the back of the sweater (even though I knew this was a risk and was trying not to). This was compounded by the fact that I was using a turquoise thread that closely matched the main yarn (I was advised by different people both to do that and to choose contrasting thread. Guess which was better advice?) So ripping out those stitches one at a time was a slow process.
Once that was finally done I rethreaded the machine with red thread, and sewed my first successful line. Yay! Had a small hiccup starting the second line – I tried to oversee the first few stitches to keep them anchored and overdid it. The sewing machine tried to eat my sweater. But once I got that fixed, the second line was also fairly easy.
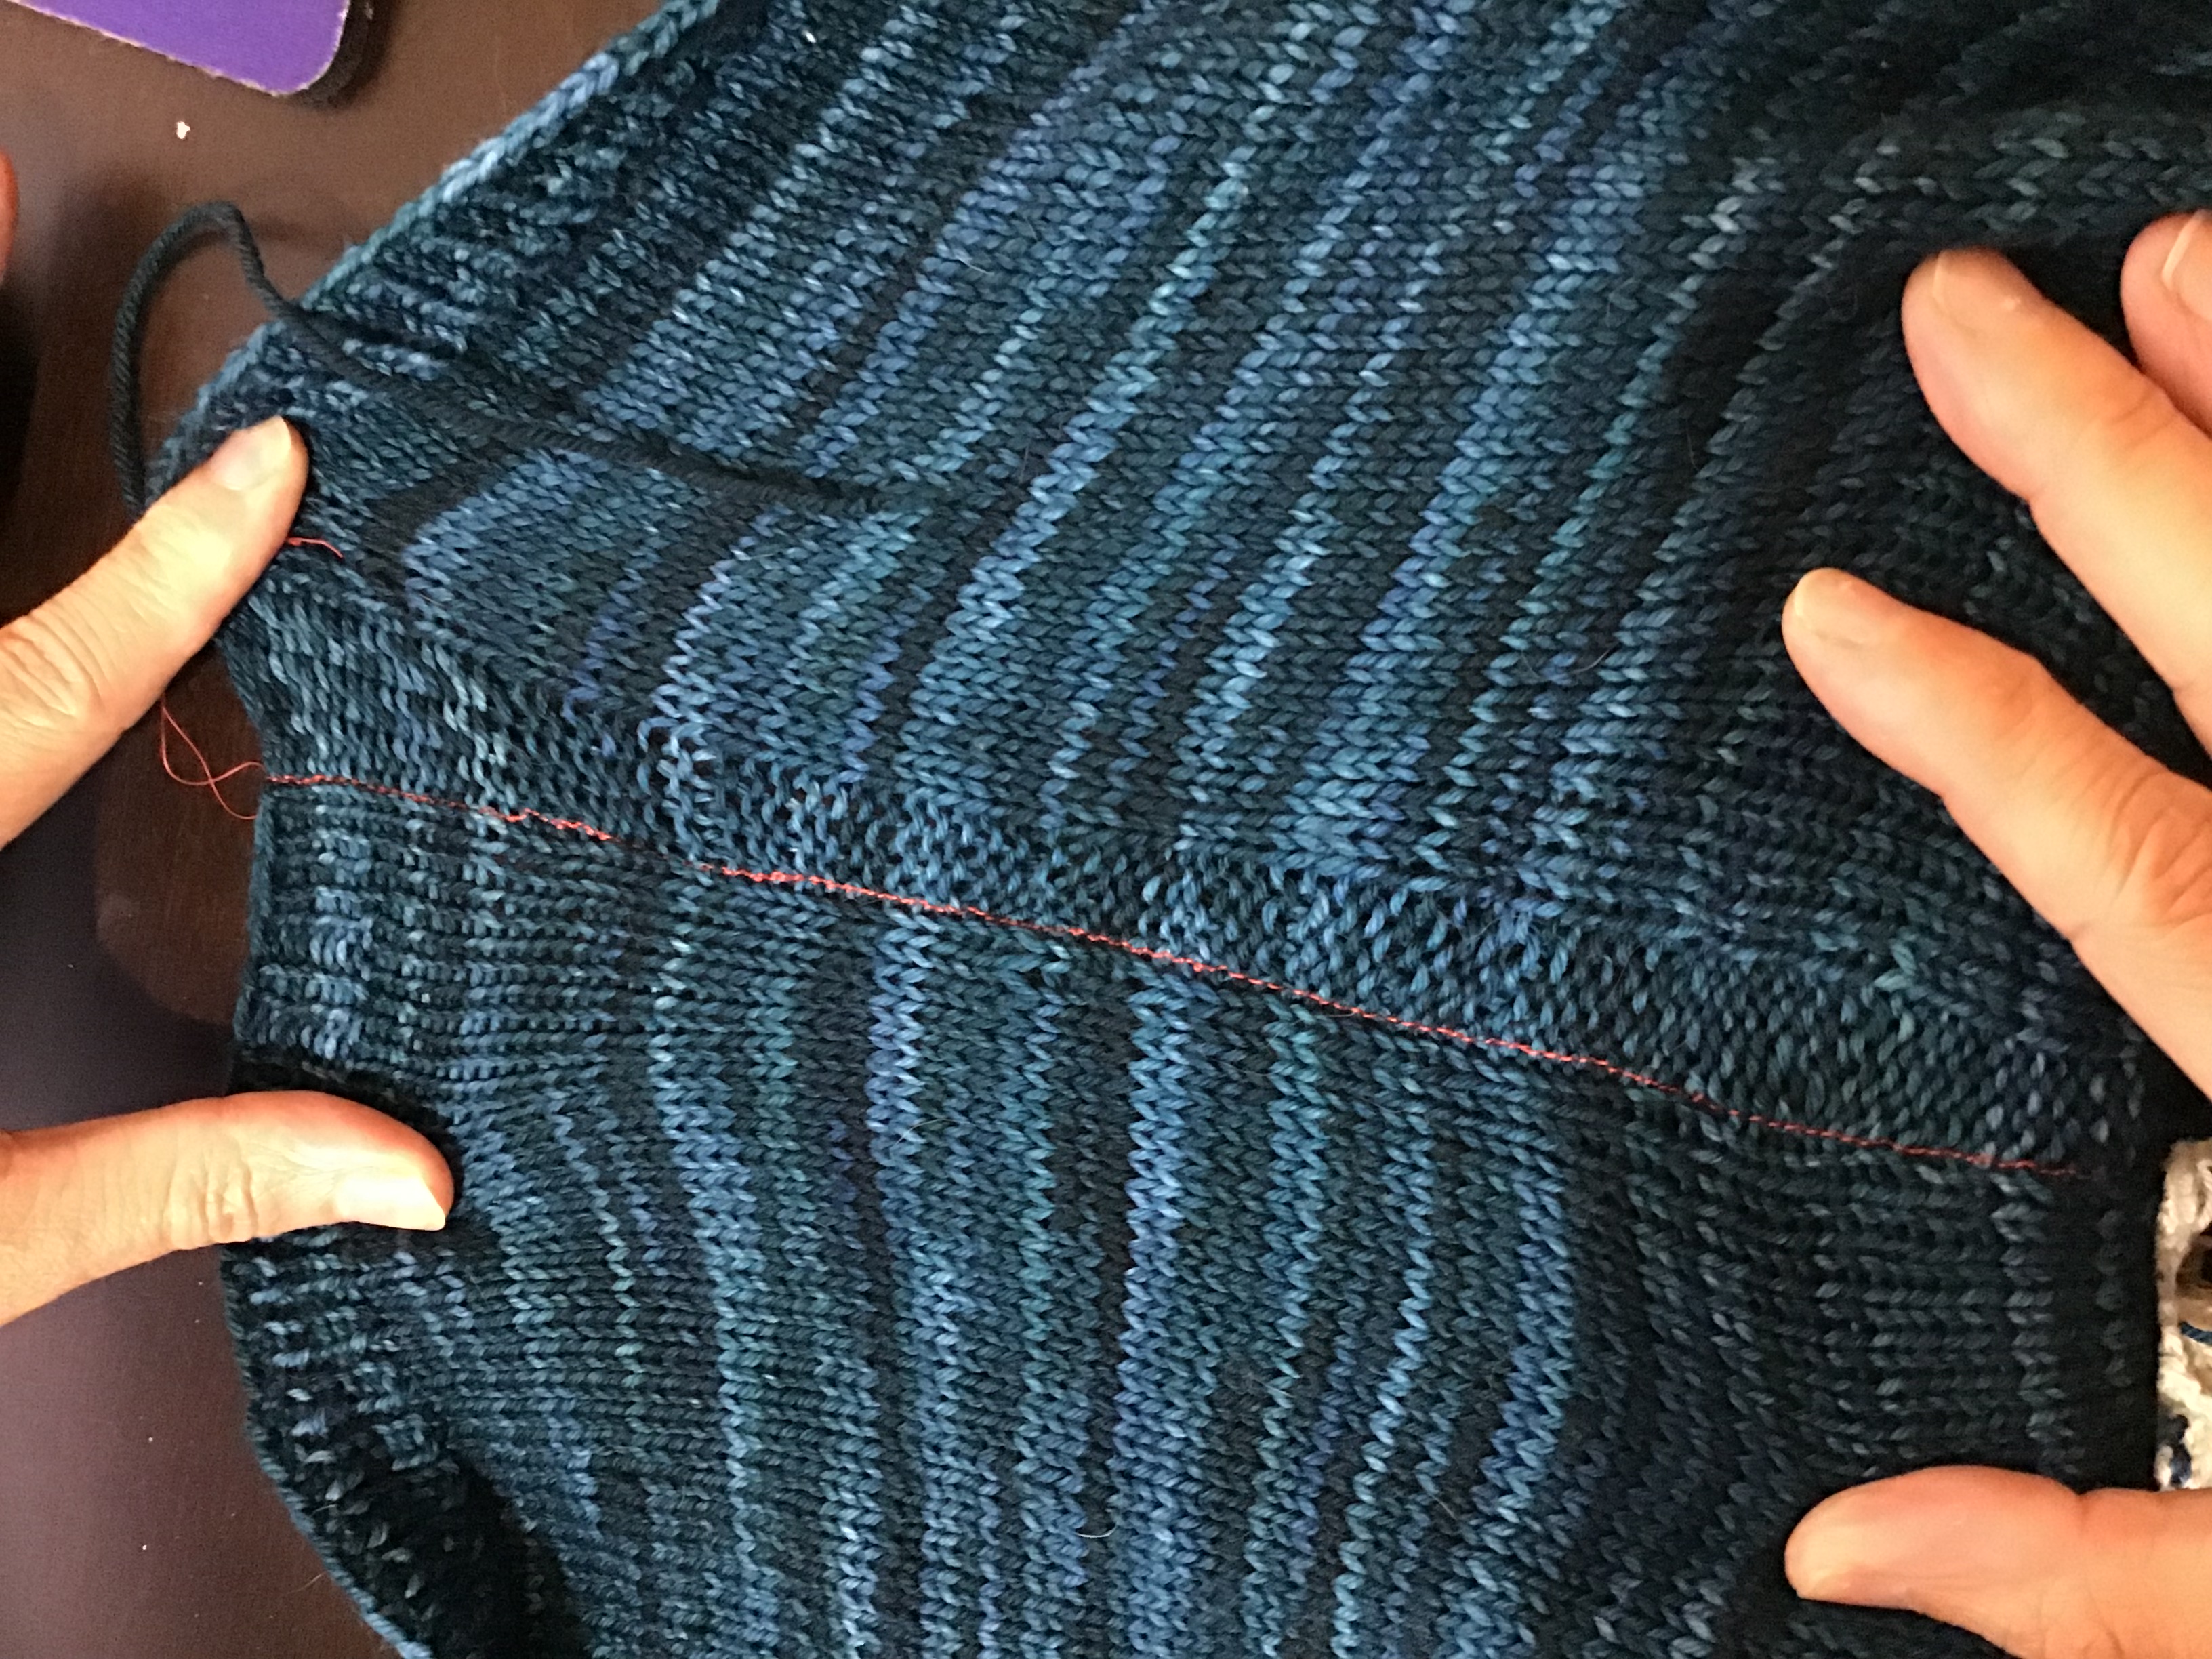
Cutting it was nerve wracking; the knitting designer’s second bad decision was to carry floats the whole length of the steek section, which made it hard to see where to cut. I had tried to use both yarns in a checkerboard pattern, but it looked terrible due to the knit/purl combination, so I gave up on that after a few rows and just tried to anchor my floats. Also, with the carried yarns and the superwash yarn used for the pattern (another bad design decision and not mine – it was sold as a kit and was a present to me) the edge stitches unraveled more than they’re supposed to, but not too far.
In contrast, my only previous steeking experience was a lot more pleasant. I crocheted instead of sewing to stabilize the edges, the steek section was knitted in a traditional checkerboard so there were no long floats, and the yarn was a traditional “sticky†one that didn’t try to unravel (Dale of Norway Helio). I don’t really grudge the time spent learning the sewing machine – at least I did learn something, and it will be easy when/if I use it again. I think if I were to make a simple skirt now, the cutting (and probably the dealing with elastic) would be more of an issue for me than the actual sewing.  So if I ever steek again, it’s at least possible that I will sew it instead of crocheting, especially if it’s a full-length steek like this instead of a shorter one for a sleeve or neckline zipper.  But for sure any other steaks I do will use traditional methods and yarn – they’re traditional for a reason!

